Every Spring I always get an itchy green thumb, so I decided to put that to good use and do a gardening unit with the kiddos.
Here are some of the fun things we did during this gardening unit:
The first week we focused on flowers. During calendar time I drew a flower on poster board and each day we labeled new parts. Our planting seed song was sung to the tune of "The Wise Man Built His House Upon the Rock" and it went like this:
You plant your seed down in the ground (hold arm out in front of you like the ground then pretend to pick up a seed and slip it between your middle fingers)
You plant your seed down in the ground (repeat action)
You plant your seed down in the ground (repeat action)
And then it starts to grow (thumb up)
The roots grown down and the stem and leaves grow up (wiggle fingers down from your "ground arm" then point finger up above "ground arm" and branch fingers out like a tree)
The roots grow down and the stem and leaves grow up (repeat action)
The roots grow down and the stem and leaves grow up (repeat action)
And that's how your garden grows
All the girls can sing this song and proudly name all the parts of the flower that we learned (seed, roots, stem, leaves, petals) and they know what all the parts do. :).
Each day we also watched a short video or cartoon clip about planting gardens.
We also planted flowers one day. The seedlings all came up. I'm waiting until they are just a bit bigger then we will transplant them to the lovely yellow buckets that are waiting on the porch.
All the girls enjoyed planting seeds. They thought it was fun to try to guess what the seed would be like by looking at the flower. They were pretty surprised by how different seeds can look.
If they all make it we will have quite a lovely display
I made this flower blossom number game. The numbers are separate so the older girls were able to count the stems, match the numbers to the correct flower card, then put on the pompom blossoms. I helped the younger girls find the correct number after they counted the stems and then they added the blossoms. Even the youngest enjoyed just putting blossoms on the stems and counting with help.
Lots of fun times and a great taking turns small group activity as well.
These are the beautiful paper plate flowers that the girls artistically painted. They loved doing this. Each girl did at least three. They took some home...
And we put some up on our wall.
For Mother's Day I thought it might be nice to make something for mommies to put in their gardens. This is the frame for the stepping stones that my hubby made. :). He does great work.
Here are the girls carefully (or not so carefully) adding their lovely stones and beads. I had to frequently remind them not to push too hard, I think at least half of the treasures are buried under the cement. :)
They all seemed to enjoy the process, though they weren't too sure about getting their hands messy in the cement. (Well one of them probably would have happily done a full body print, but the others weren't so sure). ;)
The finished products.
And the girls made fantastic Mother's Day cards. I love how hard they all worked on these. The insides were just as wonderful.
The second week we focused on vegetable gardening. We planted bean and pumpkin seeds in ziplock in the window so we could watch the planting process.
As you can see, the beans shot up and were fascinating to watch, the pumpkins never sprouted. we all brainstormed and decided that maybe they needed dirt and the dark to start growing.
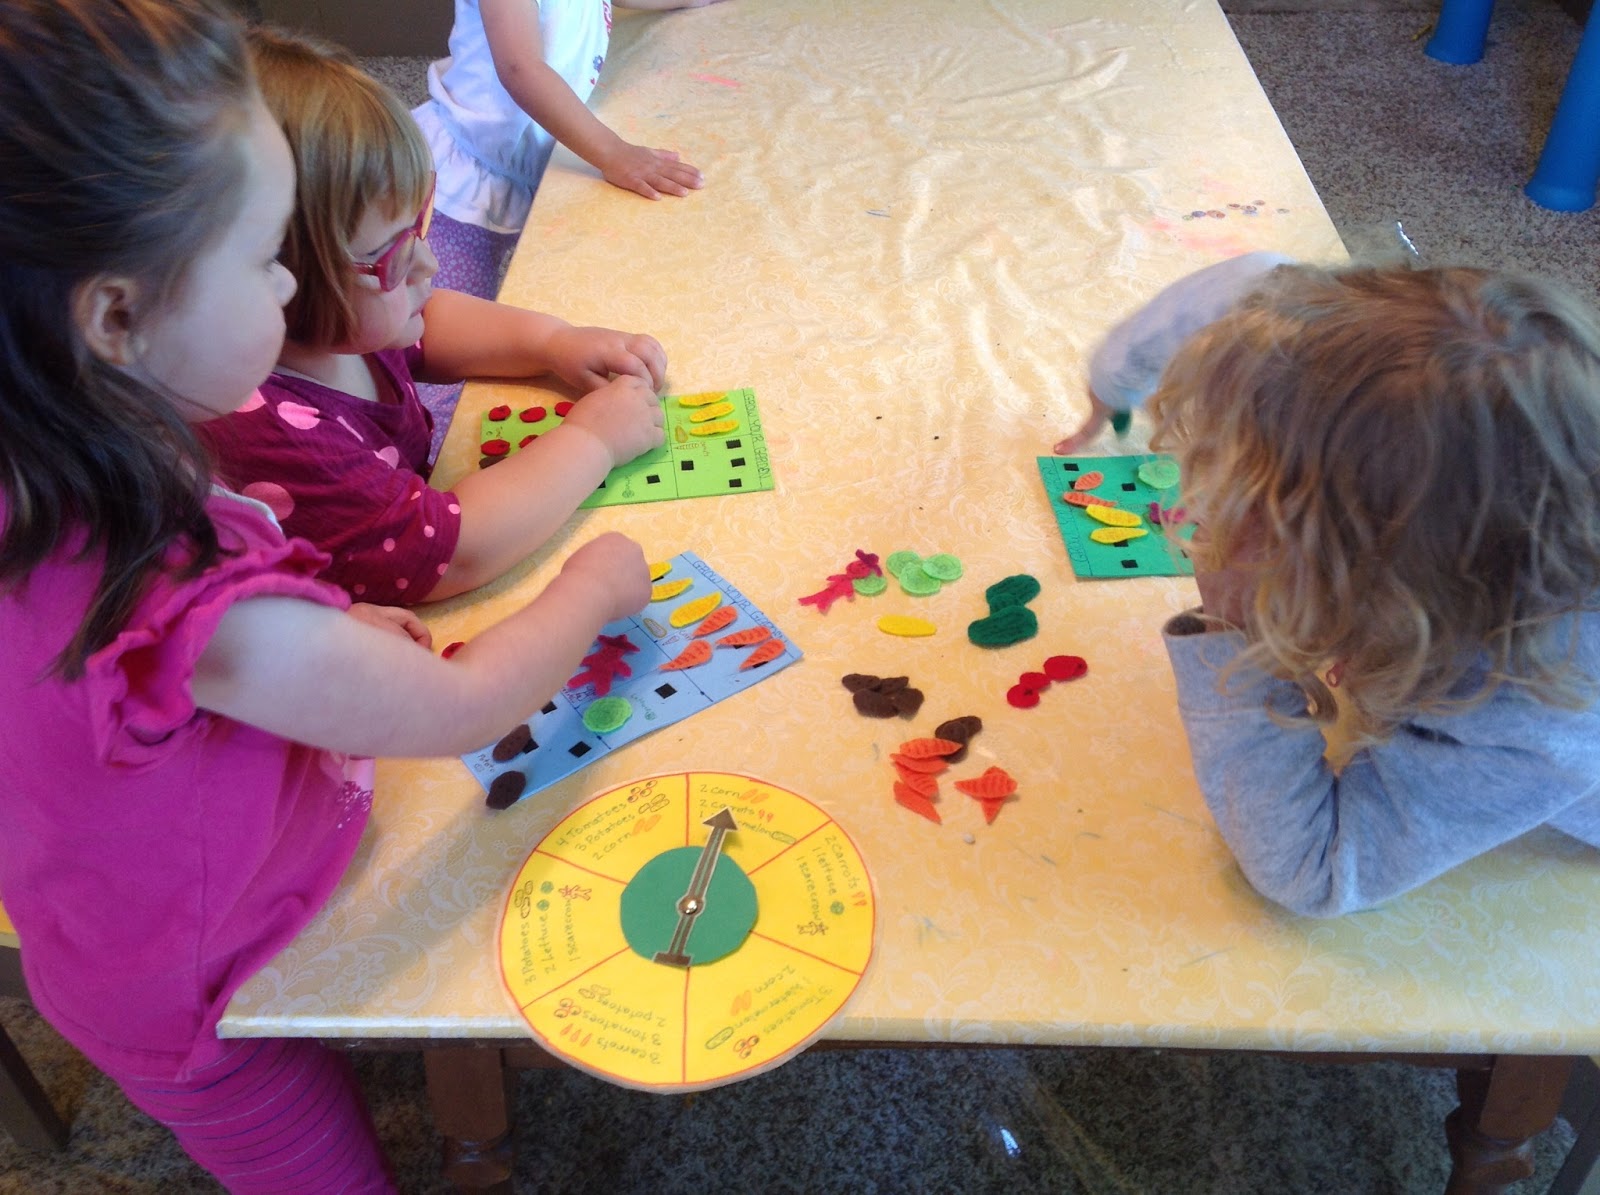
Tis is th garden game I made. Each section on the spinner has a few different vegetables so whichever the arrow lands on are the vegetables you add to you garden patches. The first to completely grow their garden wins. (There is also a scarecrow for fun!)
We liked this game. We played it again...
And again. (It is made with foam "garden patch" sheets, Velcro (just the rough side on the foam sheets) , and felt vegetables that stick to the rough Velcro. The spinner is just card stock laminated and a brad.
One day our art was torn vegetables that we put into a garden on the wall. :). Tearing paper is a lot of fun and good for kiddos to do also.

.
We also planted a vegetable garden. First We planned out the garden, looking at our seeds and deciding where we wanted all the plants to be.
Then we went outside and planted it. This is now a wonderful daily recess activity. Everyone gets a ketchup or mustard squirt bottle then they go and water all our plants (and each other). :). I didn't get pictures of all the activities we did during this unit (like planting the flowers in the front, watering, drinking from straws like roots, and the flower dice growing game) but I covered most of it. We had lots of fun and learned a lot about gardening.
I loved gardening and planting seeds and the girls did too, but the hard part is, of course, the waiting. Gardening takes a lot of patience, especially when you are 2,3, and 4.